If you're running Google Ads but not tracking conversions, you're essentially guessing where your money is going. Proper CPA (cost-per-acquisition) tracking helps you measure campaign success, optimize spending, and improve ROI. Here's what you'll learn in this guide:
- Why CPA tracking matters: Without it, you can't identify which clicks lead to sales or leads.
- What you'll need: A Google Ads account, auto-tagging enabled, and access to your website's code or Google Tag Manager (GTM).
- How to set up CPA tracking: Create conversion actions, install tracking tags, and classify actions as Primary (for bidding) or Secondary (for reports).
- Testing and troubleshooting: Use tools like Google Tag Assistant and GTM Preview Mode to ensure your setup works.
- Improving accuracy: Regular audits, privacy compliance (like Consent Mode), and Enhanced Conversions can refine your tracking.
Accurate tracking is essential for leveraging smart bidding strategies like Target CPA, which can lower your acquisition costs and improve campaign performance. This guide provides step-by-step instructions to ensure your setup is effective and compliant.
How To Measure CPA In Google Ads (Simple Explanation)
What You Need Before Setting Up CPA Tracking
Getting CPA tracking right requires a few key tools and settings. Without these in place, you can’t properly install tracking or measure conversions accurately. Here's what you'll need to get started.
Google Ads Account and Conversion Tracking
First, you’ll need an active Google Ads account with admin permissions. This gives you access to the Goals and Conversions menus.
Make sure auto-tagging is turned on in your account settings. Auto-tagging adds a Google Click Identifier (GCLID) to your ad URLs. This unique identifier helps Google link website conversions back to specific ad clicks. Be aware, though, that if auto-tagging is off or the GCLID is stripped from URLs during redirects, your tracking won’t work.
With auto-tagging sorted, it’s time to understand the types of conversions you can track.
Types of Conversions You Can Track
Google Ads supports four primary types of conversions:
- Website conversions: Actions like purchases, form submissions, newsletter sign-ups, or page views.
- App conversions: Includes mobile app installs, first-time app opens, in-app purchases, and other app events.
- Phone call conversions: These track calls made directly from ads, calls to your website’s phone number, or clicks on phone numbers on mobile websites. Keep in mind, calls must last at least 60 seconds to count as conversions by default.
- Offline conversions: These cover actions that begin online (via an ad click) but finish offline, such as in-store purchases, phone-based sales, or other real-world interactions.
When setting up conversions in Google Ads, you’ll need to classify each action as either Primary or Secondary. Primary actions are used for optimizing bidding strategies (like Target CPA), while Secondary actions are for reporting purposes only and don’t influence automated bidding.
After defining your conversion types, the next step is ensuring you can install the tracking tags needed for measurement.
Website Access for Tag Installation
To install tracking tags, you’ll need access to your website’s code. Specifically, you’ll need to:
- Add the Google tag to the
<head>section of every page. - Place event snippets on specific pages, such as "Thank You" or order confirmation pages, to track conversions.
If you don’t have direct access to edit your site’s code, you can use Google Tag Manager (GTM). GTM allows you to deploy and update tracking tags without needing to modify the site’s code repeatedly. If your conversion happens on a domain different from your landing page, you’ll also need to configure a domain linker to ensure the GCLID passes between domains.
For testing and debugging, use the Google Tag Assistant extension for Chrome. Additionally, link your site to a Google Analytics 4 (GA4) account. This connection allows you to import key events as conversions into Google Ads and enables cross-channel performance tracking.
If you’re using a website builder, many platforms offer built-in support for Google Tag Manager, simplifying the integration process. For a list of website builders with strong support for tools like GTM, check out Top Website Builders.
Once you’ve secured website access and set up the necessary tools, you’re ready to configure conversion actions in Google Ads.
Setting Up Conversion Actions in Google Ads
Once you've completed the prerequisites, the next step is to set up conversion actions. This ensures you can track specific user behaviors and accurately measure your CPA (cost per acquisition).
How to Access the Conversions Page
To get started, click the Goals icon in the left-hand menu and navigate to Conversions > Summary. This will take you to the main conversions page, where you can review current conversion actions or create new ones.
Creating a New Conversion Action
Click the + New conversion action button and choose one of the following sources: Website, App, Phone calls, or Import. If you're setting up website conversions, enter your domain URL and click Scan. If Google detects an existing tag or a GA4 link, you can skip the manual tag installation process.
Next, configure the details of your conversion action:
- Name: Choose a clear and descriptive name, such as "Lead Form Submit – Contact Page."
- Value: Assign a value to the conversion. This can be fixed, variable, or left as none, depending on your goals.
- Counting Method: Decide whether to count conversions as "One" (e.g., a single lead per user) or "Every" (e.g., multiple purchases).
- Conversion Window: Set the time frame for tracking conversions. The default is 30 days, but you can adjust this from 1 to 90 days.
Once you've configured these settings, proceed to select the conversion type that aligns with your desired user action.
Choosing the Right Conversion Type
Pick the conversion type that best fits your goals:
- Website: Ideal for tracking purchases or sign-ups.
- App: Use this for app installs and in-app events.
- Phone calls: Track calls made to your business.
- Offline: For actions that start online but are completed in-store.
For each conversion action, you'll need to classify it as either Primary or Secondary:
- Primary Actions: These are used for automated bidding strategies, such as Target CPA, to help optimize performance.
- Secondary Actions: These are for observation only and won’t affect bidding.
After setting up the action, check the Status column in the Conversions summary. If it says "Recording conversions", the tag is active and functioning. If it shows "Unverified", the tag is present but hasn’t tracked any conversions yet. Use these status indicators to confirm everything is working before moving on to testing.
How to Install CPA Tracking on Your Website
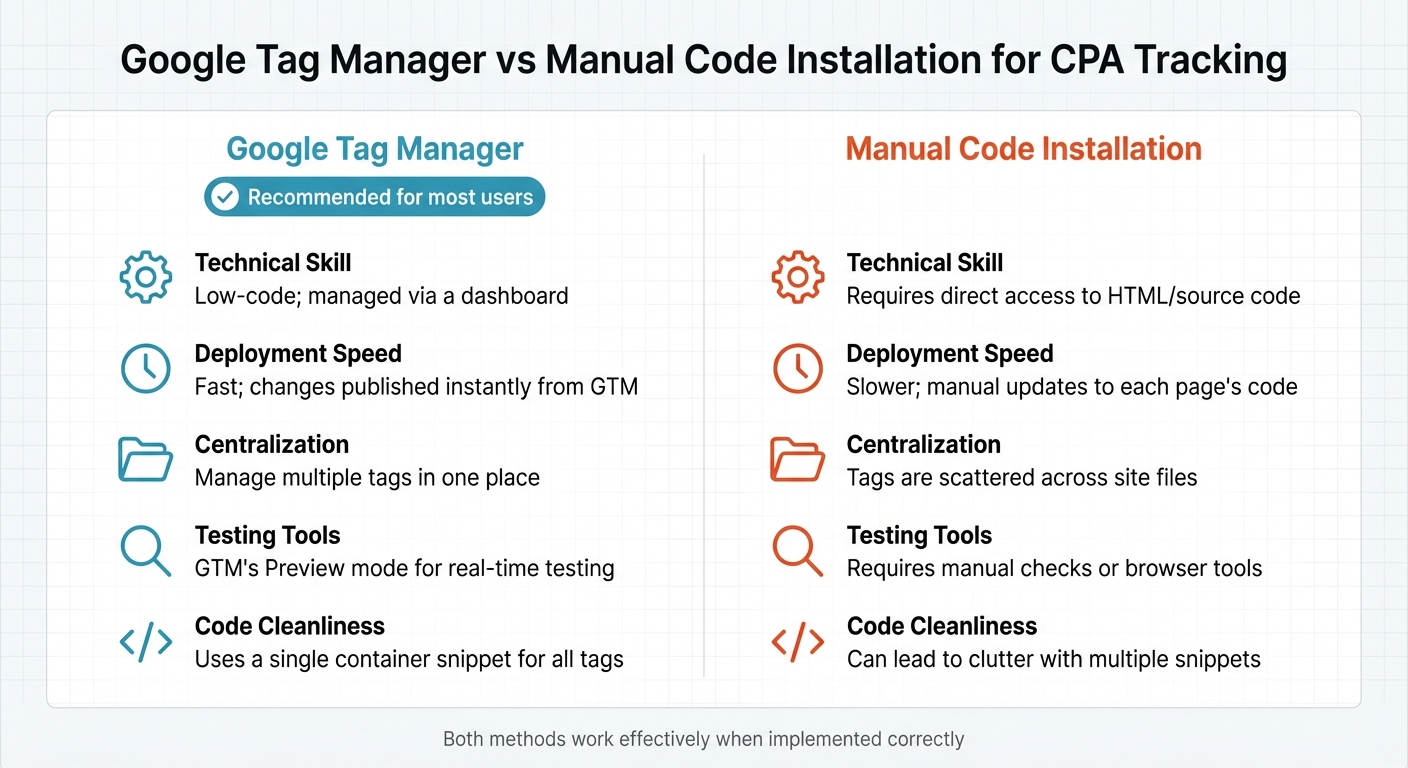
Google Tag Manager vs Manual Code Installation Comparison
To set up CPA tracking on your site, you can choose between two approaches: the manual method, which involves directly editing your website's code, or Google Tag Manager (GTM), which offers a dashboard-based interface for managing tags without altering your site's HTML every time.
Manual Code Installation (Global Site Tag and Event Snippet)
This method requires adding two distinct code snippets to your site. The Google tag (formerly known as the Global Site Tag or gtag.js) must be placed on every page, while the event snippet is added only to specific conversion pages, such as "Thank You" or "Order Confirmation" pages.
-
Set Up the Global Site Tag
Log in to Google Ads and go to Tools > Data Manager. Click Manage under the Google Ads tag card, then select Installation instructions and choose Install manually. Copy the<script>block provided and paste it into the<head>section of every page on your site, immediately following the opening<head>tag. This establishes the tracking framework and enables first-party cookies. -
Add the Event Snippet
During the setup of your conversion action, choose Manual code installation. Select between Page load (for confirmation pages) or Click (for buttons like "Buy Now").- For page load tracking: Copy the event snippet and paste it into the
<head>section of your conversion page, directly after the Google tag. - For click tracking: Place the snippet on the relevant page and attach an
onclickevent to the element you want to track, such as a button.
- For page load tracking: Copy the event snippet and paste it into the
Pro Tip: Avoid adding multiple Google tags to the same page. If you already have a Google tag from another service, like Google Analytics, simply integrate your Google Ads conversion ID using the config command:
gtag('config', 'TAG_ID');.
Also, ensure auto-tagging is enabled so the GCLID (Google Click Identifier) is added to your URLs for accurate tracking.
Setting Up Through Google Tag Manager
For those who prefer not to modify their site's HTML directly, GTM offers a simpler, centralized way to manage tracking tags. It’s particularly useful if you frequently add or adjust tags.
-
Install GTM Container Code
Confirm that the GTM container snippets are installed in the<head>and<body>sections of your website. -
Set Up a Conversion Linker Tag
In GTM, create a Conversion Linker tag and configure it to fire on "All Pages." This ensures proper attribution across domains and browsers. -
Create a Google Ads Conversion Tracking Tag
Use the "Google Ads Conversion Tracking" template in GTM. Enter your unique Conversion ID and Conversion Label, which you generated in Google Ads when creating your conversion action. -
Define Triggers
Establish when the tag should fire by creating a trigger. For example, you can set it to fire on a specific URL (e.g.,/thank-you/) or after a form submission. Use GTM's Preview mode to test that your tag fires correctly before publishing. -
Publish Your Changes
Once everything is set, click Submit in GTM to publish your container. Keep in mind that tags won’t track live data until the container is published.
Helpful Tip: Clearly name your tags and triggers, such as "Google Ads - Lead - Thank You Page." GTM also supports Enhanced Conversions, which uses hashed first-party data (like email addresses) to improve tracking accuracy. Coordinate with your development team to ensure that triggers, such as button IDs, remain functional during site updates.
| Feature | Google Tag Manager (GTM) | Manual Code Installation |
|---|---|---|
| Technical Skill | Low-code; managed via a dashboard | Requires direct access to HTML/source code |
| Deployment Speed | Fast; changes published instantly from GTM | Slower; manual updates to each page's code |
| Centralization | Manage multiple tags in one place | Tags are scattered across site files |
| Testing Tools | GTM's Preview mode for real-time testing | Requires manual checks or browser tools |
| Code Cleanliness | Uses a single container snippet for all tags | Can lead to clutter with multiple snippets |
sbb-itb-94eacf4
Testing Your CPA Tracking Setup
Once you've installed your tags, it's time to ensure they're working properly. Testing your tracking setup is crucial before spending any of your advertising budget. Thankfully, Google offers several tools to help you confirm that your tags are functioning as expected.
Testing with Google Tag Manager Preview Mode
If you're using Google Tag Manager (GTM) for your tracking, its Preview Mode is a great starting point. To access it, click the Preview button in the top-right corner of your GTM workspace, enter your website URL, and click Connect. This will open the Tag Assistant interface in a new tab, while your website loads in another window.
From there, navigate your site and complete a conversion action (like submitting a form or landing on a "Thank You" page). Check the timeline in Tag Assistant to see if the correct events are being triggered. Look under the Tags Fired section to confirm your CPA tag is firing. If it’s listed under Tags Not Fired, click on it to review why the trigger conditions failed.
"There is nothing worse than working with GTM blindly and trying to guess if your setup is working."
– Julius Fedorovicius, Founder, Analytics Mania
Use the Variables tab to confirm that dynamic values, such as the conversion value or transaction ID, are being captured accurately. The Data Layer tab can help verify that your website is sending conversion data to GTM correctly. For the most accurate results, test in an Incognito window with browser extensions disabled to avoid interference from ad blockers or cached data. Atasun Optik, for example, saw a 93% boost in recorded conversions after switching to server-side GTM with proper setup, thanks to improved data accuracy.
After this, use Google Tag Assistant to double-check your work.
Checking Tags with Google Tag Assistant
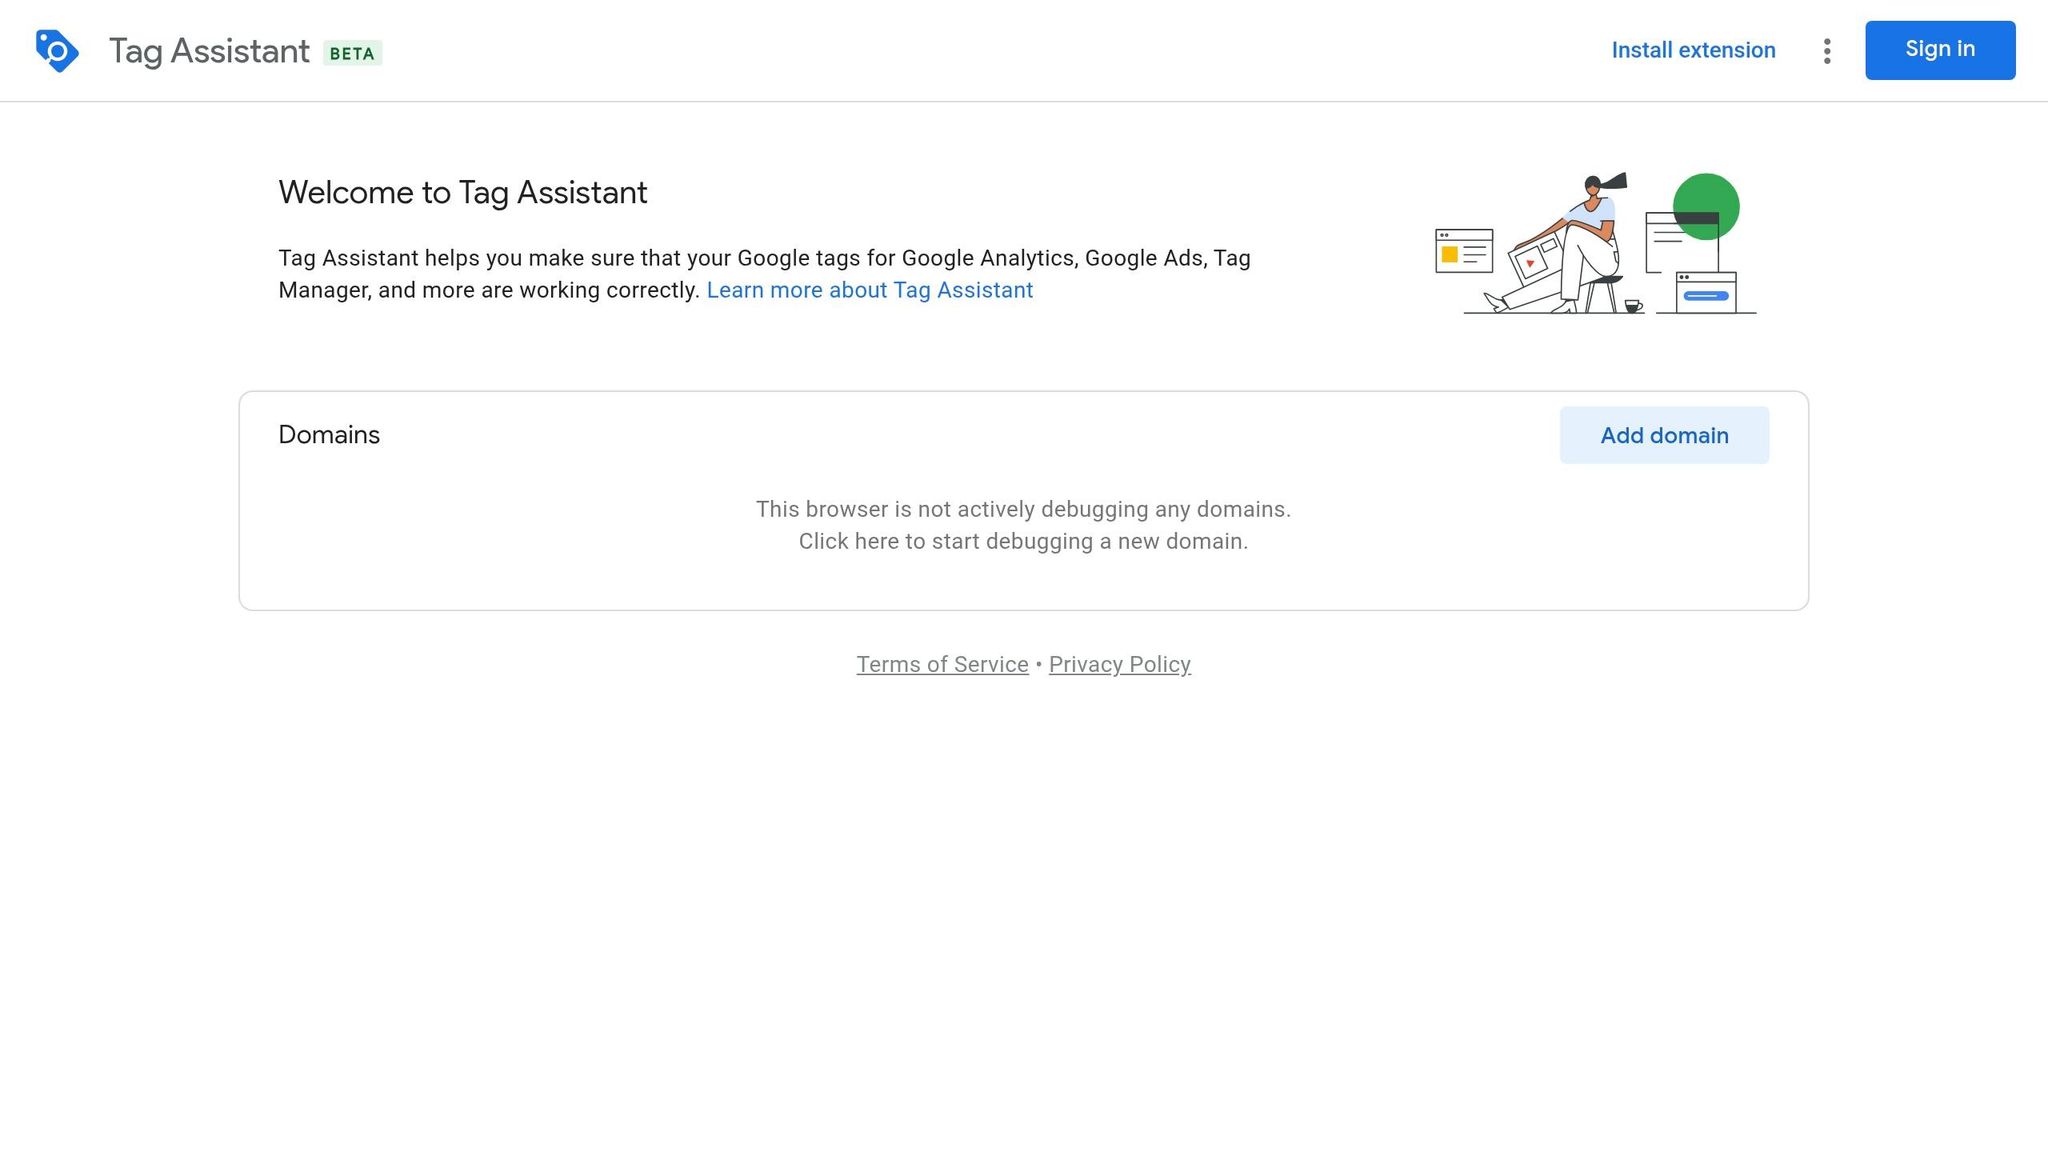
Google Tag Assistant is a handy tool available both as a Chrome extension and at tagassistant.google.com. It uses color-coded indicators to show whether your tags are functioning correctly:
- Green: Tag is installed and firing as expected.
- Blue: The tag is working but not in a standard way.
- Yellow: There are issues that could affect data accuracy.
- Red: Critical errors - your tag isn’t firing at all.
To test, click Record in the Tag Assistant extension and go through the full conversion process, from landing page to confirmation page. Check that the appropriate tags fire at each step. For instance, the Global Site Tag should fire on every page, while the Conversion Event snippet should only fire on the success or confirmation page.
"Proper tracking is paramount to the success of any PPC campaign. An incorrectly installed conversion tag prevents leads from being counted properly, impacting your ability to bid based on the data."
– Tim Jensen, Clix Marketing
If you see statuses like "Unverified" or "Tag Inactive", head to Goals > Conversions > Summary in Google Ads and click Troubleshoot. This will launch a guided Tag Assistant session directly from your account. Keep in mind, it might take up to 30 minutes after testing for the "Verified" status to appear in Google Ads.
Once you've verified that your tags are working, it's time to review the conversion data in your Google Ads account.
Reviewing Conversion Reports in Google Ads
To check your conversion data, go to Goals > Conversions > Summary in Google Ads. Look at the Tracking Status column to see how your tags are performing. Here's what the different statuses mean:
| Status | Meaning | What to Do |
|---|---|---|
| Active (Green) | Tag is working and recording conversions correctly | No action needed - you’re good to go. |
| Unverified | Google hasn’t detected the tag yet | Perform a test conversion or double-check the tag placement. |
| No recent conversions | Tag is verified but hasn’t recorded conversions in 7 days | Check for low traffic or possible issues with your trigger setup. |
| Needs Attention (Yellow) | Tag has implementation or configuration issues | Hover over the status for specific error details and fix as needed. |
| Tag Inactive (Red) | Google can’t detect your tag, and no data is being recorded | Revisit the installation on the conversion page and verify its setup. |
Ensure the Include in Conversions toggle is enabled for your primary CPA goals. Without this, Google's Smart Bidding won’t use the data for optimization. If your main report seems low, check the All conversions column, which includes cross-device and view-through conversions. Finally, give the system at least 24 hours to process data after installing a new tag before troubleshooting an "Unverified" status.
Managing and Improving Your CPA Tracking
Once your tracking setup is in place and tested, the next step is proper management. This ensures your campaigns remain optimized and continue delivering results.
Using Target CPA Bidding Strategies
After verifying your tracking and gathering data, Target CPA bidding can help automate campaign adjustments. This Smart Bidding feature relies on machine learning to tweak bids in real-time, aiming to secure conversions at or below your desired CPA. It evaluates a range of factors - like device type, location, time of day, browser, and remarketing lists - to assess the likelihood of a click leading to a conversion.
Before switching to Target CPA, ensure you’ve accumulated 15–30 conversions within a 30-day period. Without enough data, the system won’t have the insights it needs to optimize effectively. Set your initial CPA target based on your historical CPA data from the past month. If you’ve recently changed attribution models, adjust your target to reflect the percentage change in "Cost/conv. (current model)" and exclude the most recent 14 days to account for conversion delays.
You can apply Target CPA to individual campaigns or use a portfolio strategy to combine data across multiple campaigns, which can speed up optimization. Keep in mind that the system needs at least two weeks to learn; frequent changes can disrupt this process.
Keeping Your Conversion Data Accurate
Once your tracking is running smoothly, regular audits are essential to maintain accuracy and avoid wasted spend. A quarterly review is a good practice.
Start by checking your conversion snippet placement. The tag should only fire on confirmation or "Thank You" pages, not on landing pages or forms, to avoid counting page views as conversions. Next, review your counting method: for lead generation, use "One conversion" to avoid duplicating counts for the same user, while e-commerce campaigns should use "Every conversion" to track each purchase.
Align your conversion windows with your sales cycle. For example, B2B companies with a 37-day sales cycle should use 60–90 day click-through windows, whereas shorter cycles like impulse purchases work better with 7–14 day windows. Mismatched windows can underreport conversions and mislead Smart Bidding. Also, exclude office IP addresses to prevent internal activity from inflating your conversion numbers.
Lastly, audit your "Include in Conversions" settings regularly. Only mark actions that represent actual business value as "Primary." For example, micro-conversions like page scrolls or time-on-site should be excluded, as they can lead Target CPA to optimize for less meaningful traffic. When introducing a new conversion goal, let it run for 2–3 cycles before using it for bidding, giving Smart Bidding time to adapt.
Accurate data and careful tracking are key to successful CPA management.
Privacy Compliance for Tracking
Adhering to privacy regulations like GDPR and CCPA is essential for protecting both your users and your business. If you serve users in the European Economic Area (EEA) or the UK, Consent Mode V2 is required. This feature adjusts tag behavior based on user consent, using four parameters: analytics_storage, ad_storage, ad_user_data, and ad_personalization.
Choose Advanced Consent Mode over Basic. Basic blocks all tags when consent is denied, meaning no data is collected. Advanced mode, on the other hand, uses anonymous "cookieless pings" to model conversions for users who don’t consent, capturing about 70% of conversion data compared to just 31% with Basic mode. Make sure your tags default to a "denied" state for EEA/UK users until they interact with your consent banner.
Implement Enhanced Conversions to improve accuracy while respecting privacy. This feature encrypts first-party data like email addresses and phone numbers using the SHA-256 algorithm before sending it to Google. Advertisers using Enhanced Conversions typically see a 5% to 15% increase in reported conversions, as it helps recover data lost due to cookie restrictions.
For added security and to bypass ad blockers (used by about 30% of internet users), consider server-side tagging. This method routes data through your own domain, making it harder for ad blockers to intercept and extending cookie lifespans. Services like Stape cost around $20 per month for lower-traffic sites, while Google Cloud Run for medium-traffic sites (100,000–500,000 sessions per month) typically ranges from $50 to $150 per month.
Lastly, ensure your privacy policy clearly explains what data you collect and how it’s used for advertising. Regularly review and accept Google’s Customer Data Terms and Data Processing Terms in your Google Ads "Goals" settings to stay compliant.
Wrapping Up
Getting CPA tracking right in Google Ads isn't a one-and-done task. It starts with setting up clear conversion actions, ensuring your tags are correctly placed on confirmation (or "Thank You") pages, and thoroughly testing everything before launching your campaigns. Once your tracking is up and running, you can transition to automated bidding strategies like Target CPA, allowing Google's AI to adjust bids based on actual conversion data. This guide has laid out a clear path to help you refine your approach over time.
"You can't optimize what you can't measure - and without accurate conversion data, you're wasting budget on clicks that don't convert while missing opportunities that do." - BestPPCFirm
When done right, combining accurate tracking with Smart Bidding can lower your CPA by as much as 42%. Regular audits are key to ensuring your tags are firing properly and that your conversion windows align with your sales process. Focus on tracking actions that genuinely contribute to your business goals to avoid spending money on traffic that doesn't deliver value.
FAQs
Why does my Google Ads conversion say “Unverified” even after I installed the tag?
The "Unverified" status might show up because the verification process often takes more than 24 hours to finish. If the status remains after this period, try using Tag Assistant to check if the tag is installed properly. Additionally, you can manually verify the tag to make sure it's working as intended. These steps are crucial for ensuring your Google Ads conversions are tracked accurately.
Which conversion actions should be Primary vs Secondary for Target CPA bidding?
When using Target CPA bidding, it's important to define your conversion actions wisely to align with your campaign goals.
- Primary conversion actions should focus on high-priority objectives, like purchases or lead submissions. These are the outcomes that directly support your main business goals and guide Google’s bid optimization.
- Secondary actions, such as page views or newsletter sign-ups, are less critical. While they provide useful supplementary insights, they don’t influence bidding decisions.
By structuring your setup this way, you ensure Google prioritizes the results that matter most to your business.
How do I prevent double-counting conversions when using GTM and GA4 together?
To keep conversion tracking accurate and avoid duplicate counts when using Google Tag Manager (GTM) and GA4, it's crucial to configure your tags carefully. For instance, set GTM tags to fire only once per conversion, like on a dedicated 'Thank You' page. Then, import these events into GA4 instead of creating additional GA4-specific tags. You can also use methods like unique identifiers or specific tag setups to ensure conversions are tracked just once, giving you clean and reliable data.

